Many people use Boardmaker to create their communication pictures, and it is a great program that has an extensive library of pictures. If you want to use your own photos or pictures, and want the flexibility to customize your pictures and photos, give PowerPoint a try. It’s easy to use, and most of us have a copy already on our computer, so there is no extra cost. Love that for sure.
I just completed PECS LEVEL 2 training and we talked a lot about using pictures for communication.
My level 2 training went in depth over all the phases of the Picture Communication system. In phase 3, pictures are now stored inside the book. This is the phase where learners are taught to discriminate between pictures and choose the correct picture. The learner must truly look at the pictures and determine which one will get the enticer to deliver the goods!
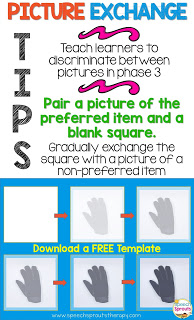
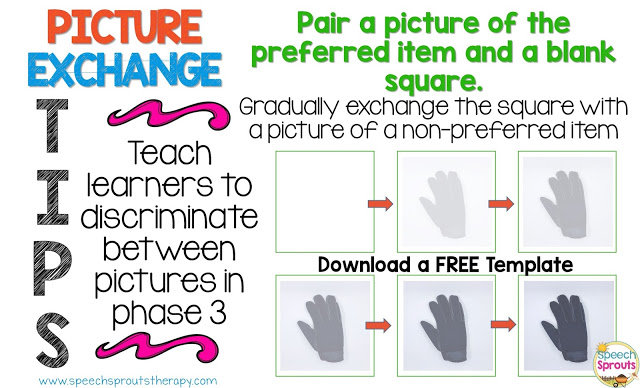
In earlier phases, the learner picks up a single picture and exchanges it for something they want. In phase 3, there is no more simply reaching and grabbing. The learner has to begin to scan for the picture they need. To teach this in increments, two pictures are placed on the front of the book. We can start with a picture of the preferred object, and a blank square. This makes it easy to differentiate which one to choose. Next you gradually change the second square to be a picture of a non-preferred item.
You need progressively lighter pictures for training phase 3.
Our trainer, Anne, suggested doing this in increments by going to the copier and producing a super light/faded copy of the picture, then several more copies that get progressively sharper and more clear until the picture is fully visible. See what I mean in the picture of the glove above.
Another way to do this is with PowerPoint if you are using photos or clipart. No worries, I created templates for you to get you started. You will need a copy of PowerPoint to use them.
~~~~~~~~~~~~~~~~~~~~~~~~~~~~~~~~~~~
First, you will need pictures to use!
In my last post, I showed you how to create awesome white-background photos of real objects using just your smartphone.
Read the post HERE. You can also use photos or pictures you find on the web, just be sure you are following copyright laws when you download them. Be especially careful if the finished product will be posted online. The Edublogger wrote a post on
The Educator’s Guide to Copyright, Fair Use and Creative Commons. Read the post to find out more about online images and copyright.
Smarty Symbols is a popular alternative for picture symbols that can be downloaded and used. They offer a paid membership. There are many free and low-cost clipart images available on
Teachers pay Teachers. A wonderful site with cartoon-style clipart that is free to use is
My Cute Graphics.
Use the FREE templates two ways for picture exchange training.
1. Create a grid of various pictures to keep interest high. In Levels 1 and 2 you will want a variety of pictures of preferred items that your learner will want to use to request. Pop a copy of each picture on top of a square in the grid and print. Save your file and you can re-print easily if pictures become lost or worn. I like to keep a file for each student, so I can find their pictures quickly.
2. Create multiple copies of the same picture that become progressively less opaque for Phase 3 PECS training. Create a grid of the same picture in progressively lighter intervals. Pop a copy of your picture on each square. Then bring the grid to the front (directions are provided for PC users) and print: No messing with that copier, and it will be ready to reprint any time you need it. Grids are provided in 2×2 inch and 1.75 x 1.75 inch squares. The grids can also be re-sized if needed.
Download the free PowerPoint templates with instructions HERE.
~~~~~~~~~~~~~~~~~~~~~~~~~~~~~~~~~~~
I learned of so many more great ideas and tips during our training.
What else did I learn? I have lots to tell you about and many great photo examples of activities that Anne brought to show us. I’ll be sharing these in my post next week, so be sure to stop back by! If you are not already following, you can get notice of new posts by following
Speech Sprouts on Bloglovin HERE.
I would love to hear what you think if you use the templates, feel free to leave me a comment.
Until next time my friends!
